When it comes to baking, there’s nothing quite as comforting as the smell of a fresh apple pie filling the air. Whether you’re an experienced baker or someone who loves the simple pleasure of homemade treats, learning how to can apple pie filling is a game-changer. Canning your own apple pie filling allows you to preserve the delicious taste of fresh apples, and enjoy them throughout the year in your pies, crisps, and even as a topping for other desserts. In this article, we’ll guide you through every step of making your own canned apple pie filling, offering expert tips and advice along the way.
Table of Contents
Why Make Canned Apple Pie Filling?
The Benefits of Canning Apple Pie Filling
Canning apple pie filling isn’t just about storing food for later; it’s about convenience, flavor, and a sense of accomplishment. Here are a few reasons why canning your own apple pie filling is a smart choice:
- Convenience: With jars of homemade apple pie filling on hand, you can have a pie ready to bake in no time, without needing to spend hours peeling, coring, and preparing apples.
- Preservation: Canning allows you to enjoy fresh, delicious apple pie filling all year round, even when apples are out of season.
- Customization: You control the ingredients—adjust the sweetness, spice levels, and even try different apple varieties to create your perfect pie filling.
- Great for Gifting: A jar of homemade apple pie filling makes for a thoughtful, homemade gift that’s perfect for holidays or special occasions.
What You Need for Canning Apple Pie Filling
Before you start, it’s important to gather all the necessary ingredients and tools for a successful canned apple pie filling recipe.
Essential Tools for Canning
- Canning Jars and Lids: Choose pint or quart jars, depending on your preference. Make sure the lids and rings are in good condition.
- Pressure Canner or Water Bath Canner: These are essential for properly processing the jars to ensure they are sealed correctly and safe for storage.
- Jar Lifter: Helps you safely handle hot jars when removing them from the canner.
- Canning Funnel: Ensures that you fill jars neatly and avoid spills.
- Ladle and Stirring Spoon: To transfer the hot apple filling into jars.
- Sterilizing Equipment: Boil your jars and lids to ensure they are free of any bacteria before filling them.

Ingredients for Canned Apple Pie Filling
The ingredients for apple pie filling are simple, yet each one plays an important role in creating the perfect texture and flavor.
| Ingredient | Quantity | Notes |
|---|---|---|
| Apples (Best for Pie) | 6 cups | Granny Smith, Honeycrisp, Fuji |
| Sugar | 2 cups | Adjust based on your taste |
| Lemon Juice | 1 tbsp | Prevents browning and adds tang |
| Cinnamon | 1 tsp | Optional, for flavor |
| Cornstarch | 1/4 cup | Thickens the filling |
| Water | 4 cups | Use fresh, clean water |
| Salt | 1/4 tsp | Enhances the flavor |
Best Apples for Pie Filling
The key to a great canned apple pie filling lies in choosing the right type of apples. Apples that are firm, tart, and hold their shape after cooking are ideal for making pie filling.
- Granny Smith: Known for their tartness, these apples hold up well in pies and make a perfect base for apple pie filling.
- Honeycrisp: Sweet with a touch of tartness, Honeycrisp apples offer a lovely balance of flavor.
- Fuji: These apples are sweet, juicy, and perfect for softer fillings.
- Jonagold: A cross between Jonathan and Golden Delicious, Jonagold apples have a nice mix of sweet and tart.
How to Can Apple Pie Filling
Now that you have all the tools and ingredients ready, it’s time to get started. Canning apple pie filling is easier than it may seem, and following the steps below will ensure you get delicious results every time.
Step 1: Prepare the Jars and Lids
Before anything else, sterilize your jars and lids. This is crucial to ensure that no bacteria contaminate your filling.
- Place the jars and lids in a large pot of water and bring it to a boil for 10 minutes to ensure they are properly sterilized.
- Once done, place them on a clean towel to dry.
Step 2: Prepare the Apples
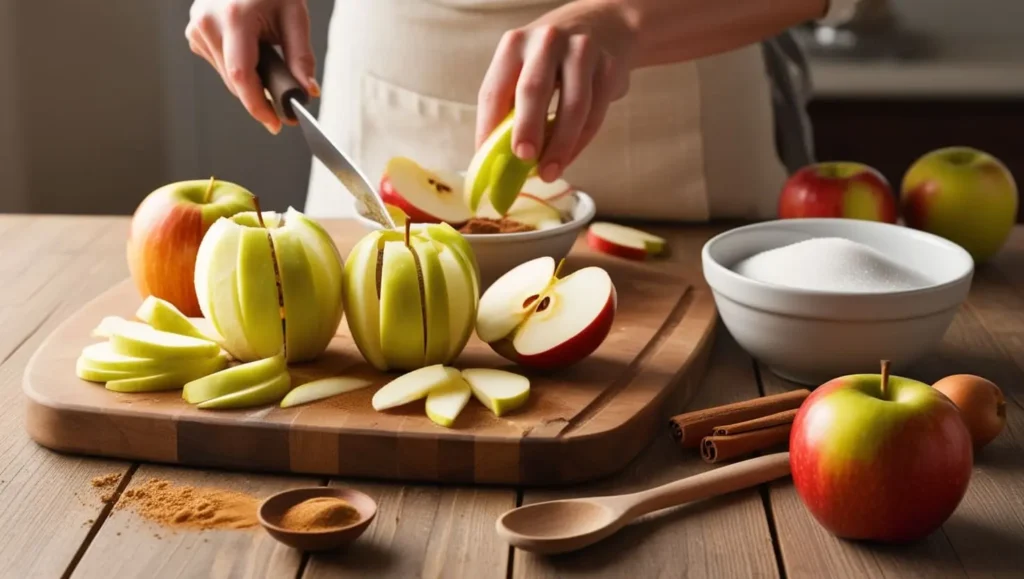
- Peel, core, and slice the apples. Aim for about 1/2 inch thick slices.
- As you slice, place the apples in a bowl of water mixed with lemon juice to prevent browning.
Step 3: Cook the Apple Pie Filling
In a large saucepan, combine the apples, sugar, cinnamon, cornstarch, salt, and water. Stir well and cook over medium heat. The mixture should thicken and become glossy as it heats.
- Tip: Taste the filling as it cooks and adjust the sweetness or spices if needed. You can add more cinnamon, nutmeg, or sugar to suit your preference.
Step 4: Fill the Jars
Once your filling is ready, it’s time to fill your sterilized jars.
- Using a ladle and canning funnel, carefully fill each jar with the hot apple pie filling.
- Leave about 1 inch of headspace at the top to allow for expansion during processing.
- Use a clean, damp cloth to wipe the edges of the jars, ensuring there is no residue for a proper seal.
Step 5: Process the Jars
Now that the jars are filled, it’s time to process them to seal them properly. You can choose between a water bath canning method or a pressure canning method.
Water Bath Canning Apple Pie Filling
- Place the jars in a canner filled with hot water, making sure the jars are fully submerged.
- Heat the water until it reaches a boil, then let the jars process for 25 minutes.
- After processing, use a jar lifter to carefully remove the jars and place them on a towel to cool.
Pressure Canning Apple Pie Filling
- If you prefer to use a pressure canner, process the jars at 10 pounds of pressure for 20 minutes.
- Be sure to follow the manufacturer’s instructions for your pressure canner for the best results.
Step 6: Check the Seal and Store
Once the jars have cooled, check the seal by pressing down on the center of the lid. If it doesn’t pop back, your jars are sealed properly.
Keep the sealed jars in a cool, dark location, where they can be stored for up to a year.
Canning Apple Pie Filling Tips
Canning can seem intimidating, but it’s actually quite simple if you follow these expert tips:
- Use Fresh Apples: Fresh apples are crucial for achieving the best texture and flavor in your pie filling. Avoid overripe apples, as they can become mushy during canning.
- Don’t Skip the Lemon Juice: It helps prevent browning and adds a subtle tang that balances the sweetness of the apples.
- Be Mindful of Headspace: Always leave about 1 inch of space at the top of your jar to allow for expansion during processing.
- Sterilize Jars Properly: Proper sterilization ensures that your canned filling stays safe and free from harmful bacteria.
- Adjust the Sweetness: Different apple varieties have different levels of sweetness, so adjust the sugar in your filling accordingly.

Frequently Asked Questions (FAQ)
1. Is it okay to use any variety of apples for making pie filling?
Yes, but some apples work better than others. Tart apples like Granny Smith and Honeycrisp are ideal because they hold their shape well after cooking.
2. What is the shelf life of canned apple pie filling?
If sealed properly, canned apple pie filling can last for up to a year. Make sure to store the jars in a cool, dark place.
3. Can I use canned apple pie filling in other recipes?
Absolutely! You can use it for apple crisps, turnovers, or even as a topping for pancakes, waffles, or ice cream.
4. Can I adjust the sweetness of my canned apple pie filling?
Yes! Depending on the apples you use, you can reduce or increase the sugar to suit your personal taste.
Conclusion
Canning apple pie filling is a rewarding and practical way to enjoy the flavors of fall throughout the year. With this simple canned apple pie filling recipe, you can have a jar of homemade goodness ready whenever the craving for apple pie strikes. By following these steps and tips, you’ll have delicious apple pie filling at your fingertips, ready to create a comforting dessert or gift to loved ones. So, what are you waiting for? Grab those apples, start canning, and enjoy the sweet taste of homemade apple pie filling all year long!

